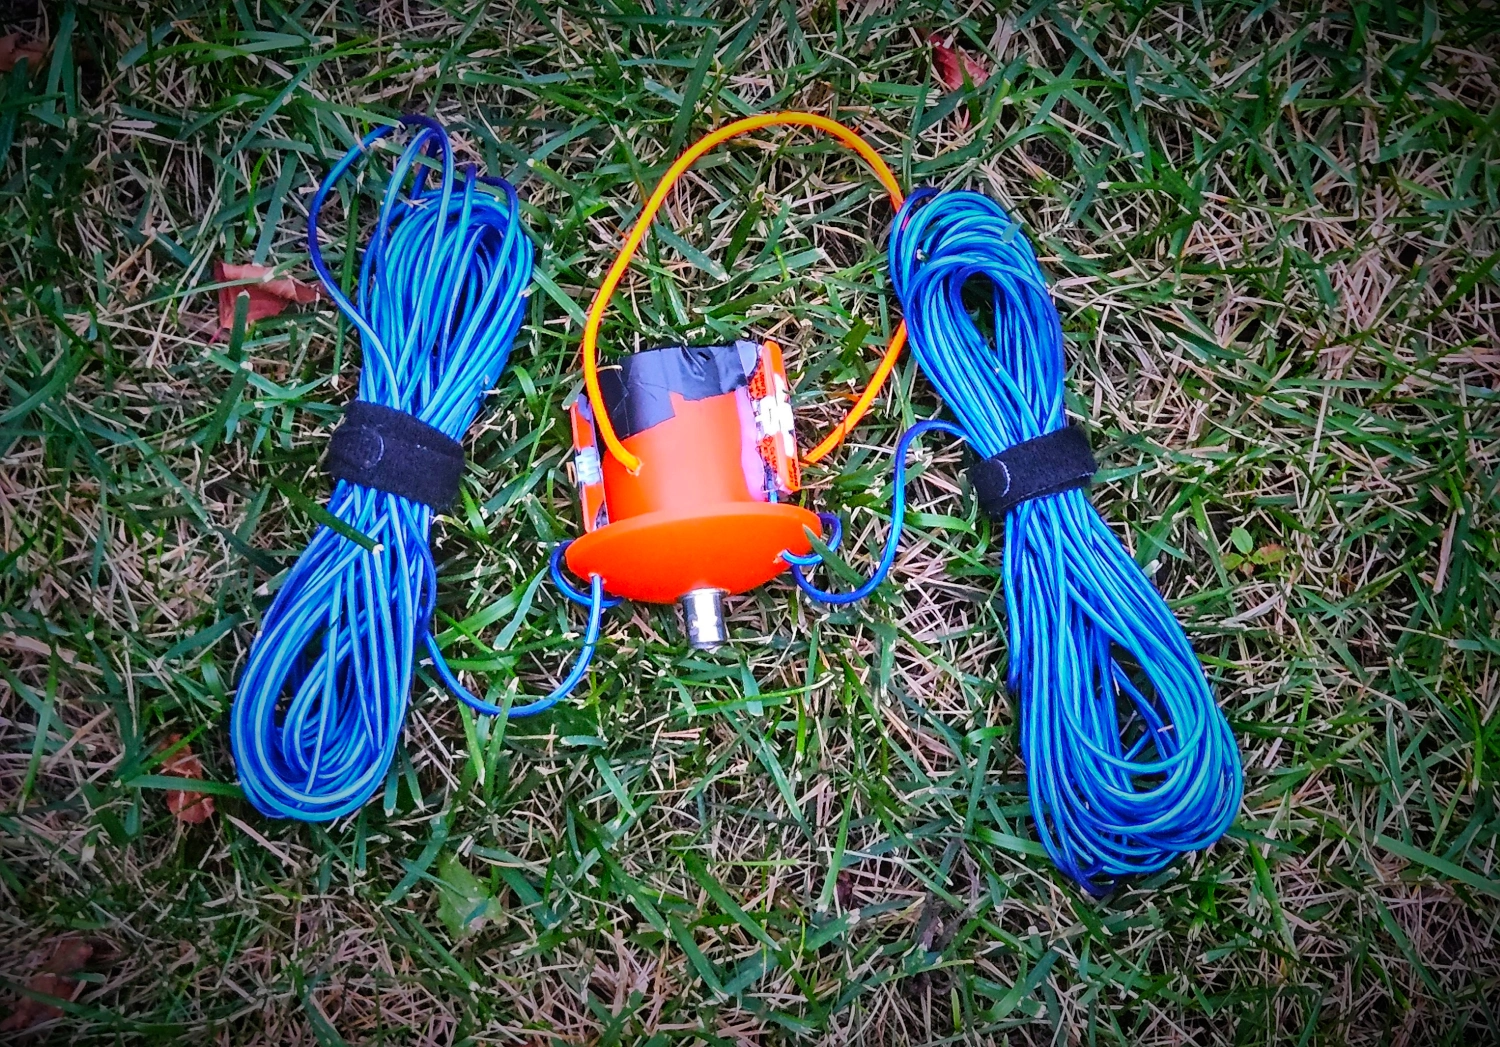
Rebar Cap Dipole
Some DIY builds in ham radio are really professional and beautiful. This build is not that! This is what I refer to as a “guerrilla” build - it’s very practical but not very polished. It’s an ultra-cheap dipole center that includes a 1:1 balun and is very versatile.
Concept
I really like using non-traditional containers for ham radio builds. Tupperware. Dollar Store Lock n’ Locks. That kind of thing. This probably hearkens back to my geocaching days! Regardless, the idea was to have a dipole center feed point with a 1:1 balun and hot-swappable radiating elements. You have one center that can be used with multiple wire lengths. You simply switch out the wires to do band changes and you’ve got a great resonant antenna that doesn’t require a tuner. The issue has always been, how do you make the element switching easy and convenient? Enter: the Rebar Cap Dipole
Build Notes
Rebar Cap
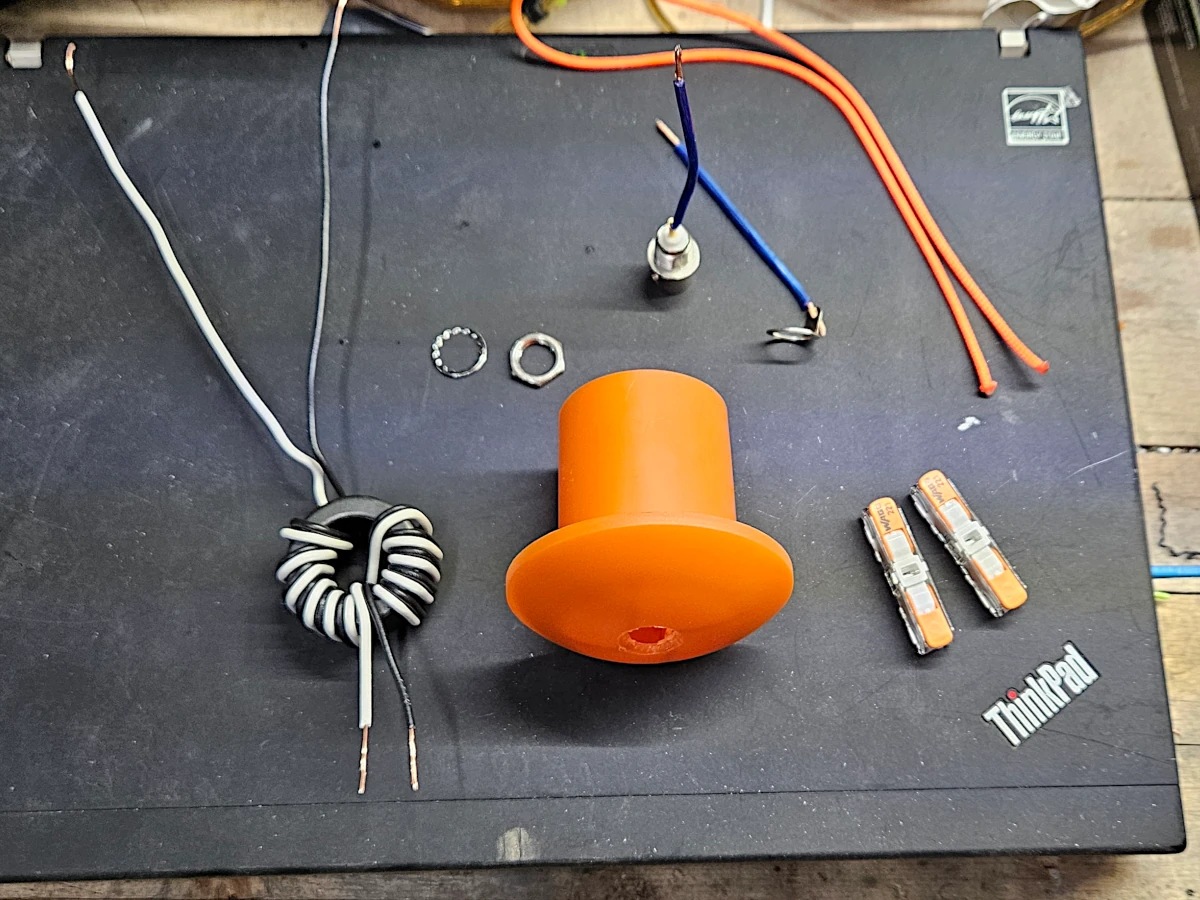
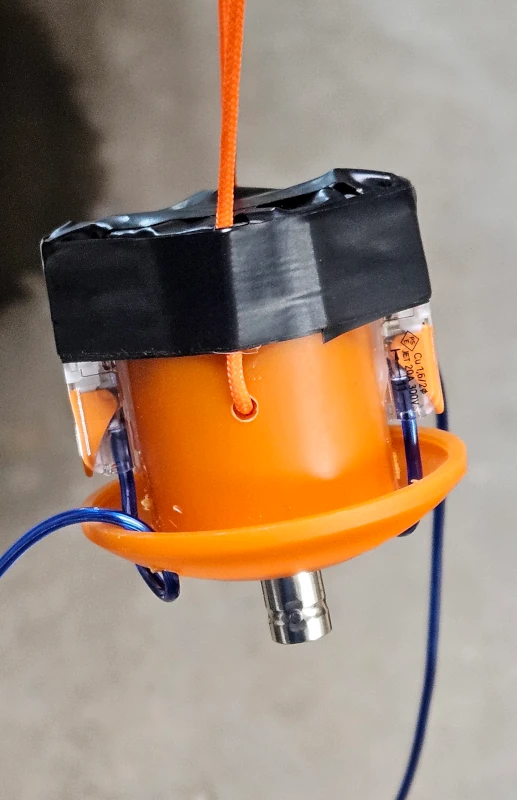
I was walking through the home improvement store and saw a bin of these things. Rebar caps. They’re a construction site safety device when you have rebar (reinforcement bar) sticking out of the ground when you are pouring a concrete foundation or piles. If you fall on rebar you will not be having a good day. These caps are used to prevent injury/impalement. They were like $0.65 Canadian, so like $0.04 everywhere else in the world. I honed out the plastic on the inside to widen the space. I drilled two holes for a piece of paracord to use as a hanger. Just a stopper knot melted with a lighter on the inside of the cap.
BNC
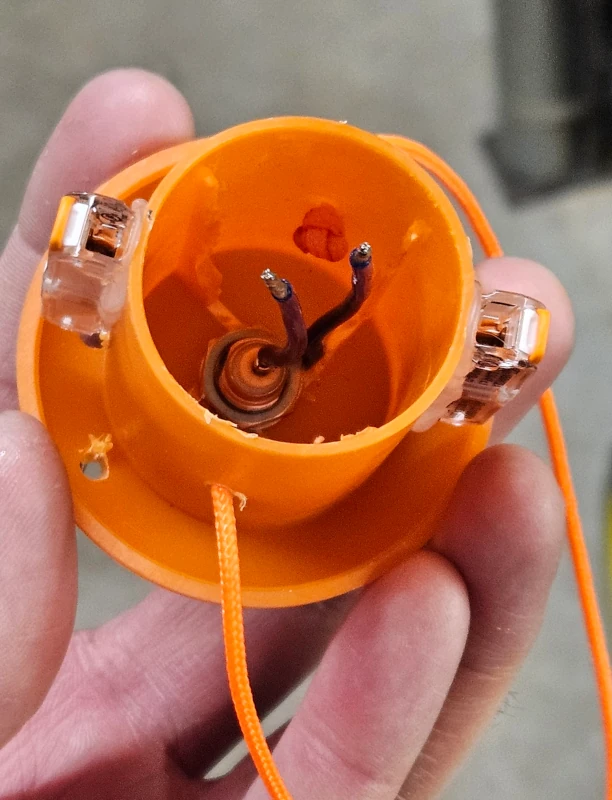
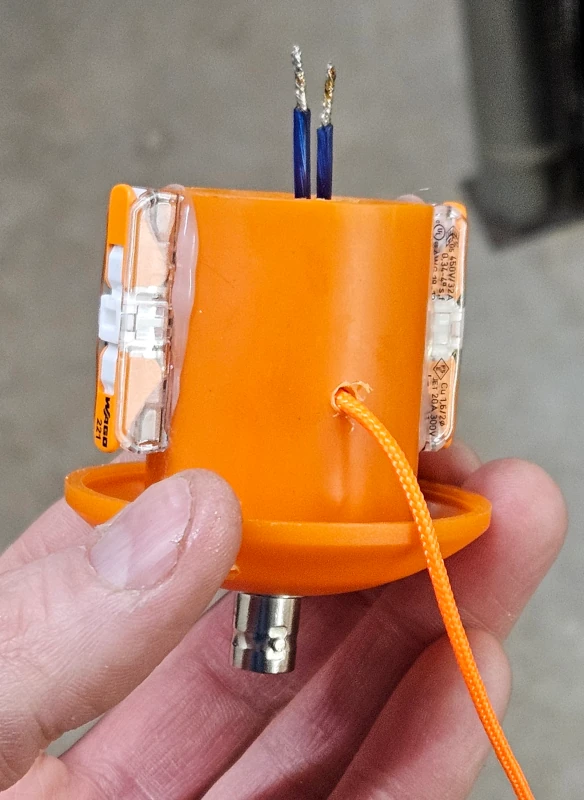
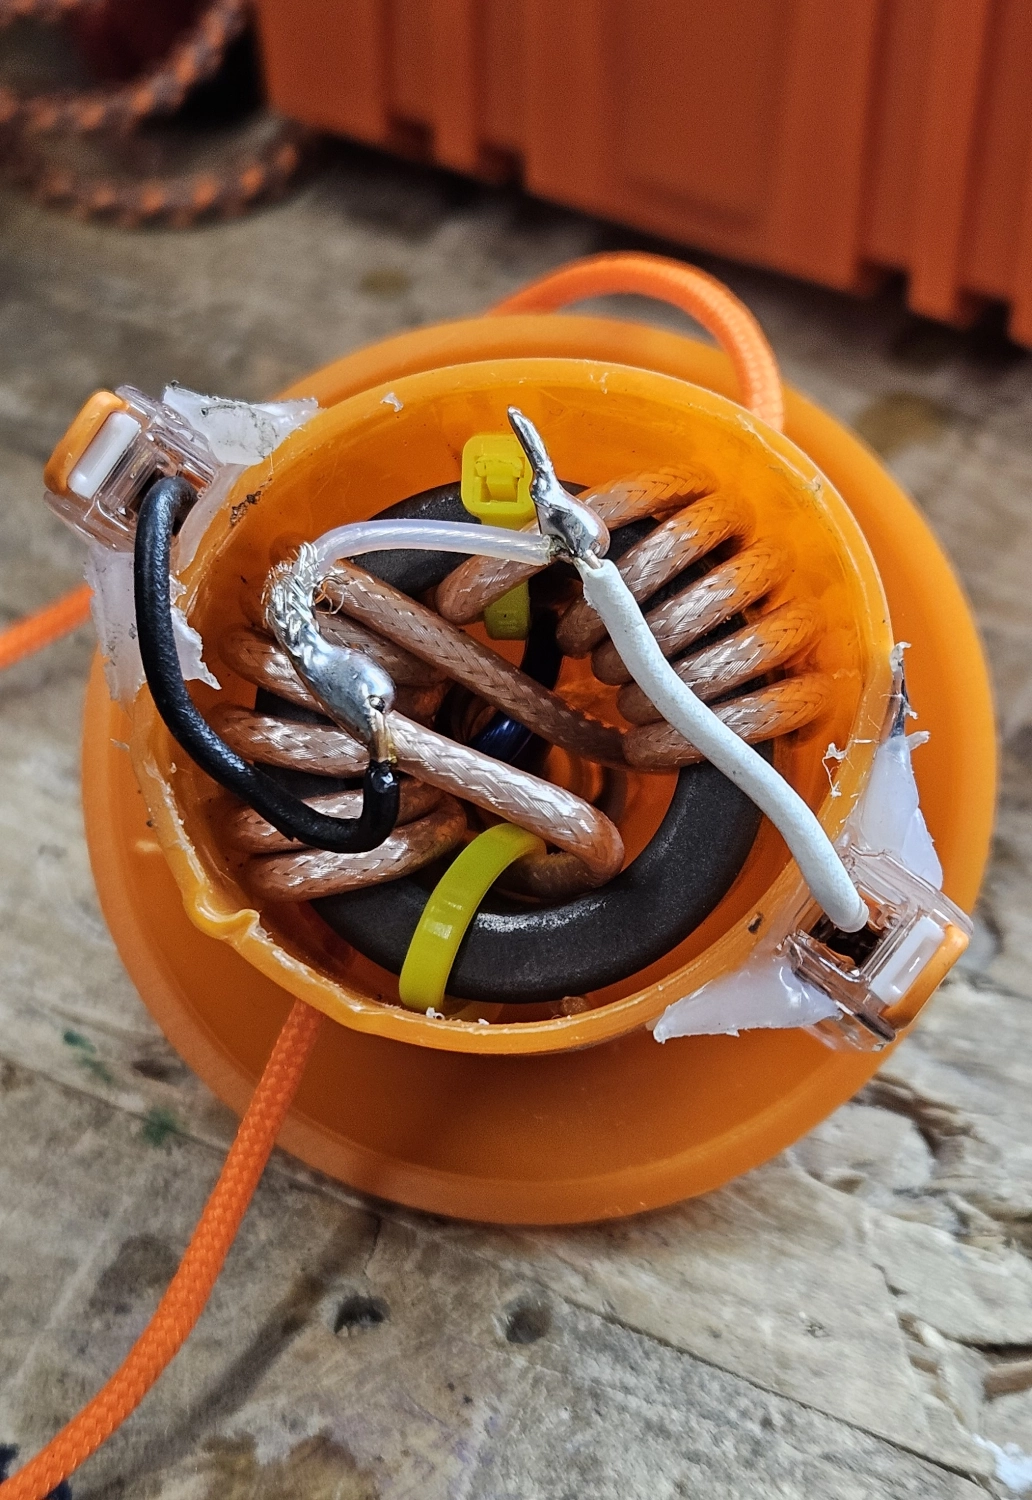
A BNC connector was the logical choice. It fits perfectly in the middle of the rebar cap and it’s not too big. I bet you could fit an SO-239 in there though. I pre-soldered a flexible wire to the center and the shield tab. Using needle nosed pliers I was able to tighten the nut on the BNC connector.
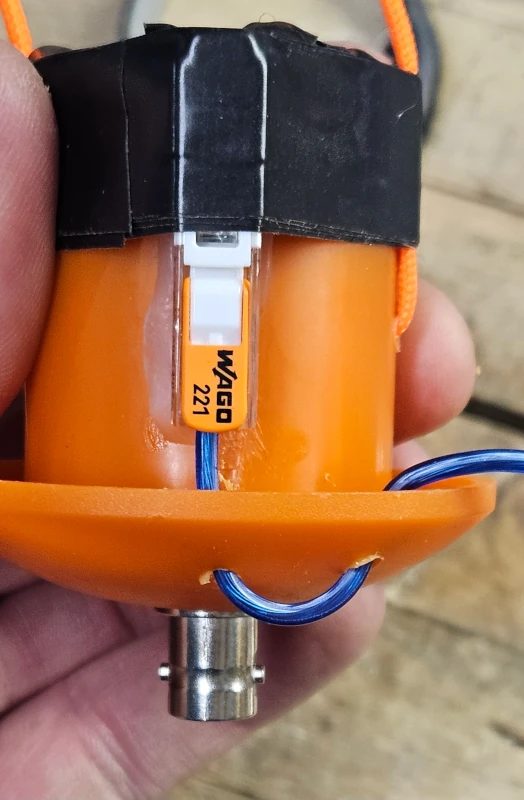
Wago Lever Nuts
And now for the magic of the build that solves the convenience problem. I hot glued on the Wago Lever Nuts to the sides of the rebar cap. These are the easy way to quickly swap elements. Just lift the lever and release the wire. Super easy and convenient. I drilled holes for the wire to come up from the bottom of the rebar cap (first I did this first before gluing the Wagos in place. I stuck a wire into the Wago connector and through the hole and then glued them in place to make sure they lined up perfectly) and an additional hole for strain relief. I wrapped the top with a bit of electrical tape for extra strength, but shrink wrap would be much nicer.
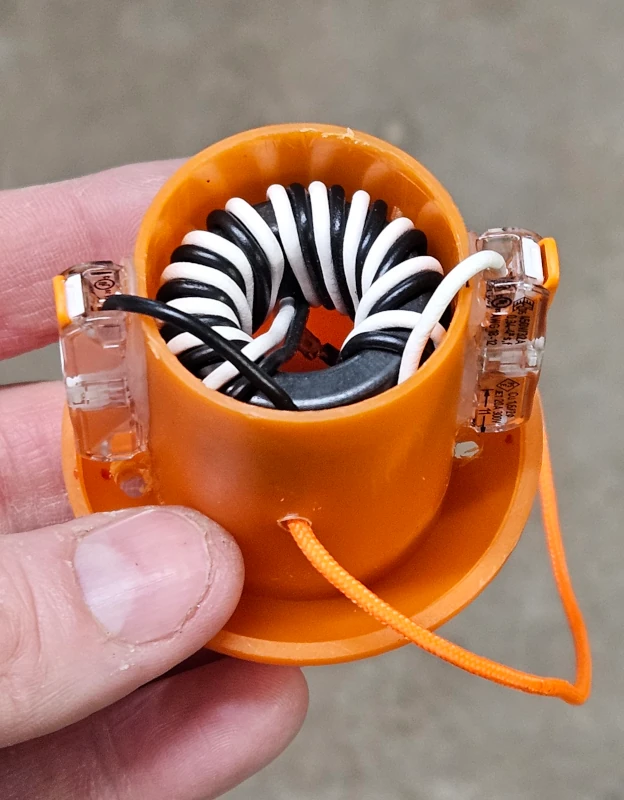
1:1 Balun
I’ve been making these handy 1:1 chokes based on the Type 31 Size: 1.142” (29.01mm)OD Core: 2631801202. They’re very convenient for incorporating into builds like hybrid UnUns and Baluns and such. This one has 12 turns of RG316 coax with a cross over. And, it fits the rebar cap like the proverbial glove. Solder the coax wire ends to the BNC wires and the other ends of the balun wires go into the Wago nuts. The balun then slides right inside the cap. This is where you could do some potting/epoxy work and make this totally waterproof. I checked everything for continuity with a multimeter.
Wire
You can use whatever wire for the elements but if you use stranded wire, it is recommended that you tin the exposed wire strands with solder. This is to prevent a frayed-end gong-show when you switch the wires out … which you know is going to happen. A wee bit o’ solder will keep everything together and happy, happy, happy. I cut a set of radials for the 30M band and plan to use this portable for digital/CW POTA operations. I’ll use it QRP but that balun can handle 100w SSB for sure.
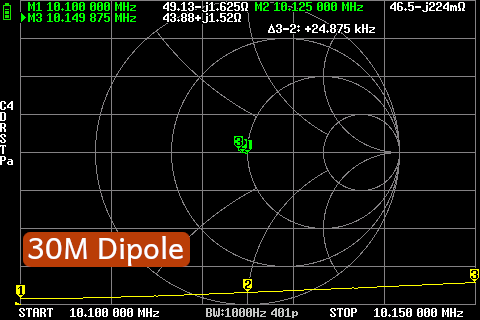
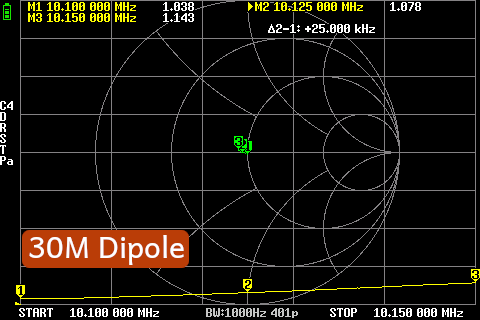
NanoVNA
I set the dipole up in an Inverted V using electric fence posts as the element holders. This is a pretty reasonable way to setup a portable dipole and set it up consistently. I trimmed the wire a wee bit to tune it up.

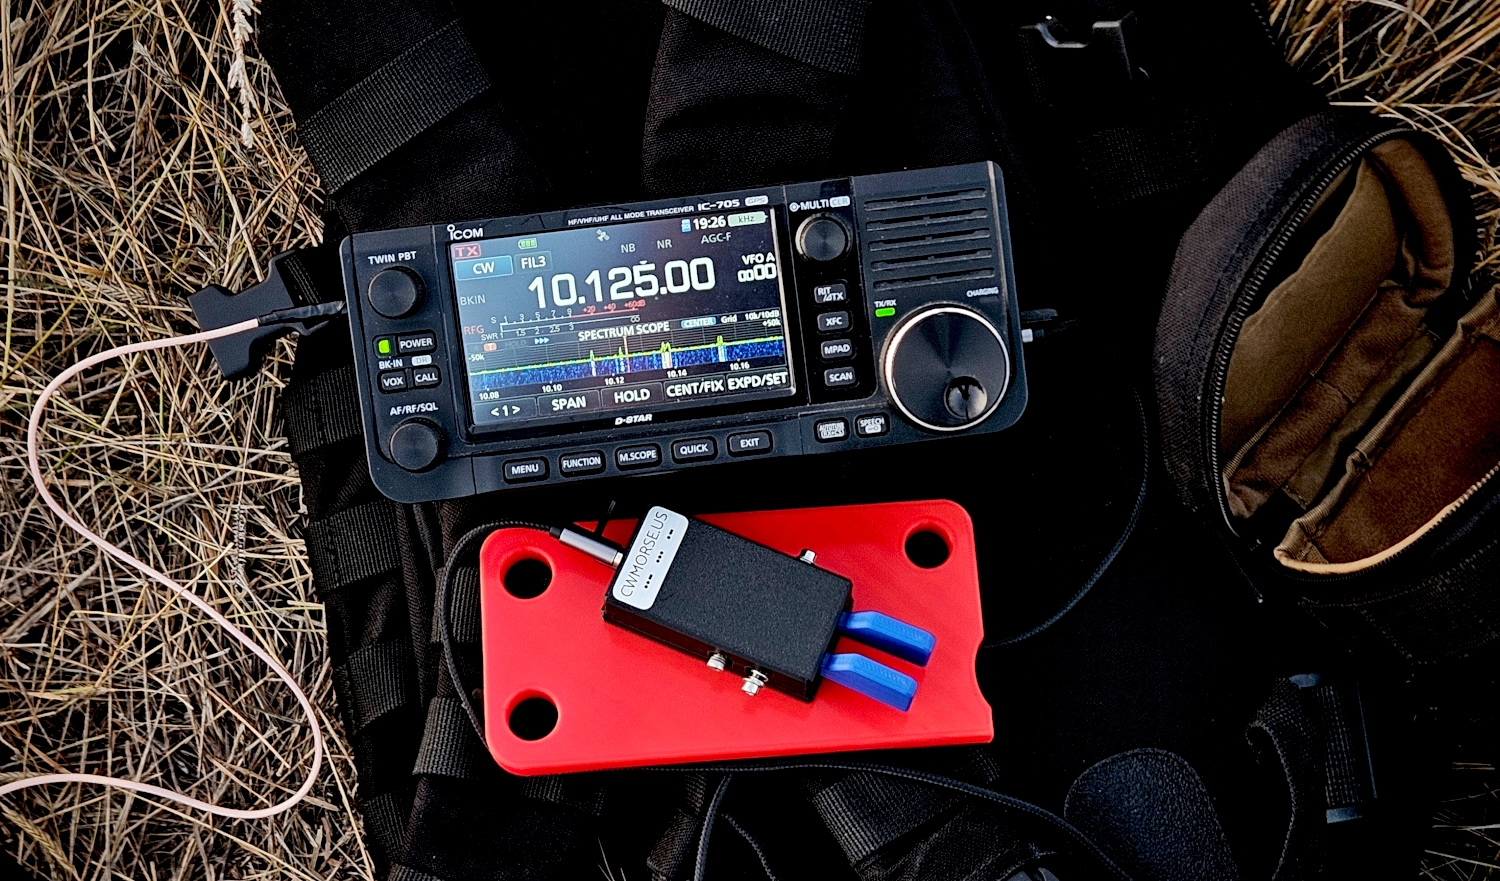
73 de VE5REV