POTA PERformer - Wire Version
A portable antenna that is taking the world by storm is the POTA PERformer designed by Greg, KJ6ER. You can contact Greg directly and he will provide you with PDF files of his build. My version is an all-wire adaptation because I still don’t have a whip.
Concept
Greg has done the proverbial metric-tonne of research on this antenna and in short, it rocks the set. His documentation is truly professional. The antenna basically consists of a main radiating element and then 2 tuned, elevated counterpoise/ground plane elements. Greg does it with an adjustable whip along with elevated, linked ground plane radials so it can be adjusted for multi-band use. But the key is that it’s always resonant on each band for maximum power transfer. No tuner is needed so losses are ultra minimal. If you’ve ever worked Greg while he’s doing POTA you know how loud he is using this setup.
Adaptation
I built this antenna from 18AWG wire for the 20M band. It’s a resonant monobander, with no adjustments. You could easily make the whole system linked if you wanted to change bands. I went for simplicity and the fact that 20M is the bread and butter POTA band by a long shot. Each wire is 1/4 wave for 20M, so around 5.08M/16’6”.
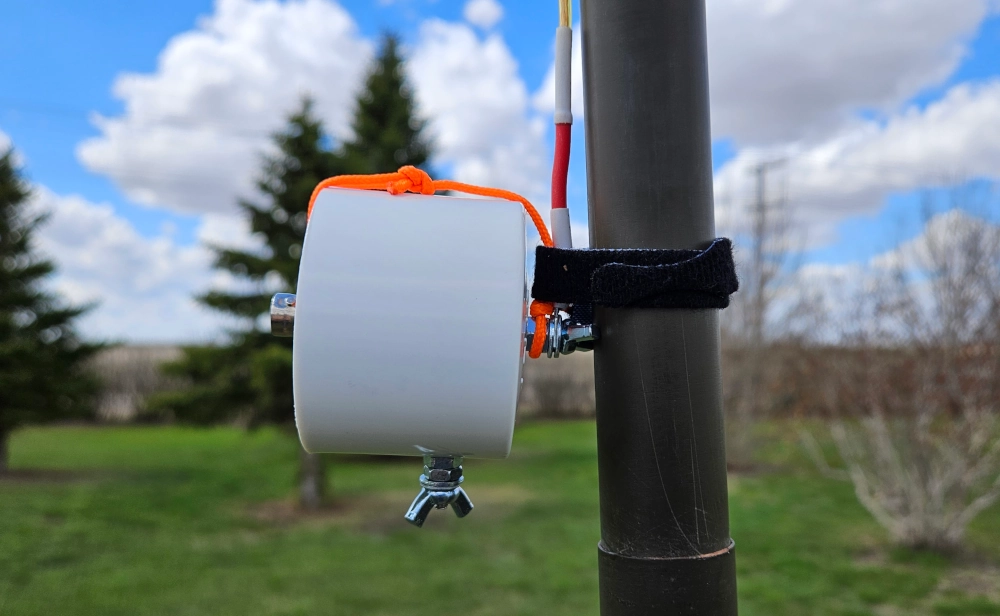
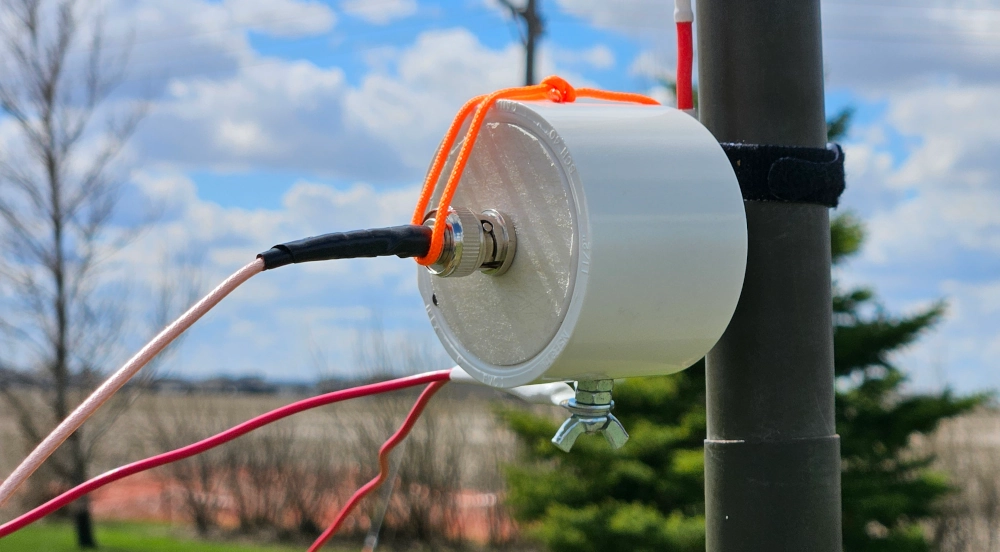
Choke
I built a typical 1:1 choke (Core: 2631801202 Size: 1.142” (29.01mm)OD. with RG-316 coax) and housed it in a PVC cap. This is connected to a BNC Connector embedded into a piece of plastic cutting board which, after soldering, was simply press-fit into the cap using a bench vise. It has two mounting screws, one for the main vertical radial and one for the two elevated ground radials. I used a little piece of 95 paracord to help keep this feed point orientated correctly in deployment.
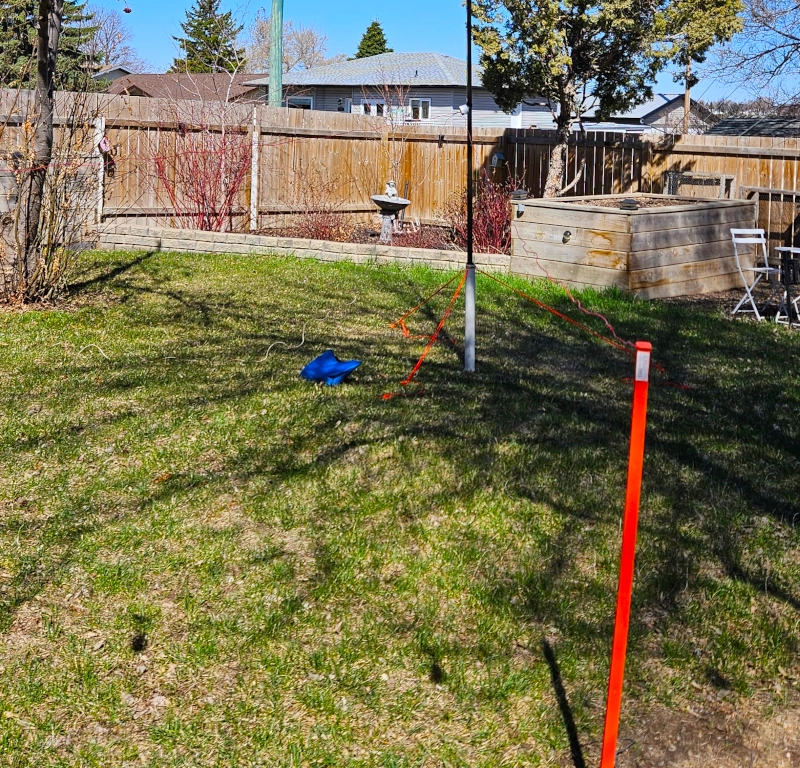
Deployment
Using my DX Commander mast, I run the vertical element up so that the bottom is about 6’ off the ground. The two ground radials are soldered together into a ring terminal (these are the same radials I use with the Rybakov). These connect on the bottom of the choke cap. I fed it with a 25’ RG-316 coax. The radials for the testing were deployed at close to a 150° angle which is pretty omni-directional. By sharpening that angle you can point this antenna a bit for directivity. I used plastic electric fence stakes to hold up the radials as they have nice plastic hooks built in.
Field Testing
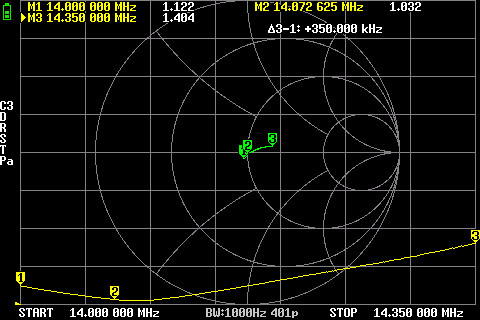
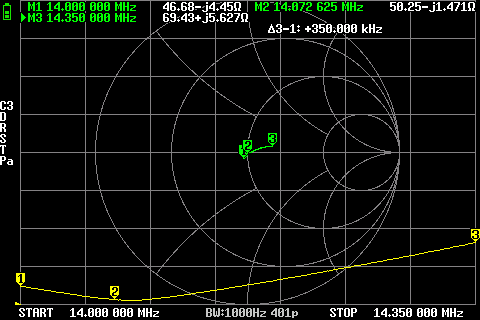
NanoVNA
Slapping this on the Nano showed great resonant results. A couple quick snips of the main element and I had it dialed in. I left it most resonant at the bottom of the band for my QRP CW operations, but you could easily trim it a bit more to dial it in for the middle of the band - which is where I normally tune my antennas.
WSPR
The WSPR results were truly mind blowing. I did my standard 1 watt, 20 minute test. I got 350 contacts. But look at that map! Both poles of the globe, DX into Europe and complete coverage of Canada and the US. Now we know why Greg calls this the “PERformer!” (Actually, the PER is an acronym for Portable Elevated Resonant). And to be clear, this test was done from my urban backyard with houses and powerlines and crap-a-plenty all around. The results are nothing less than stunning.
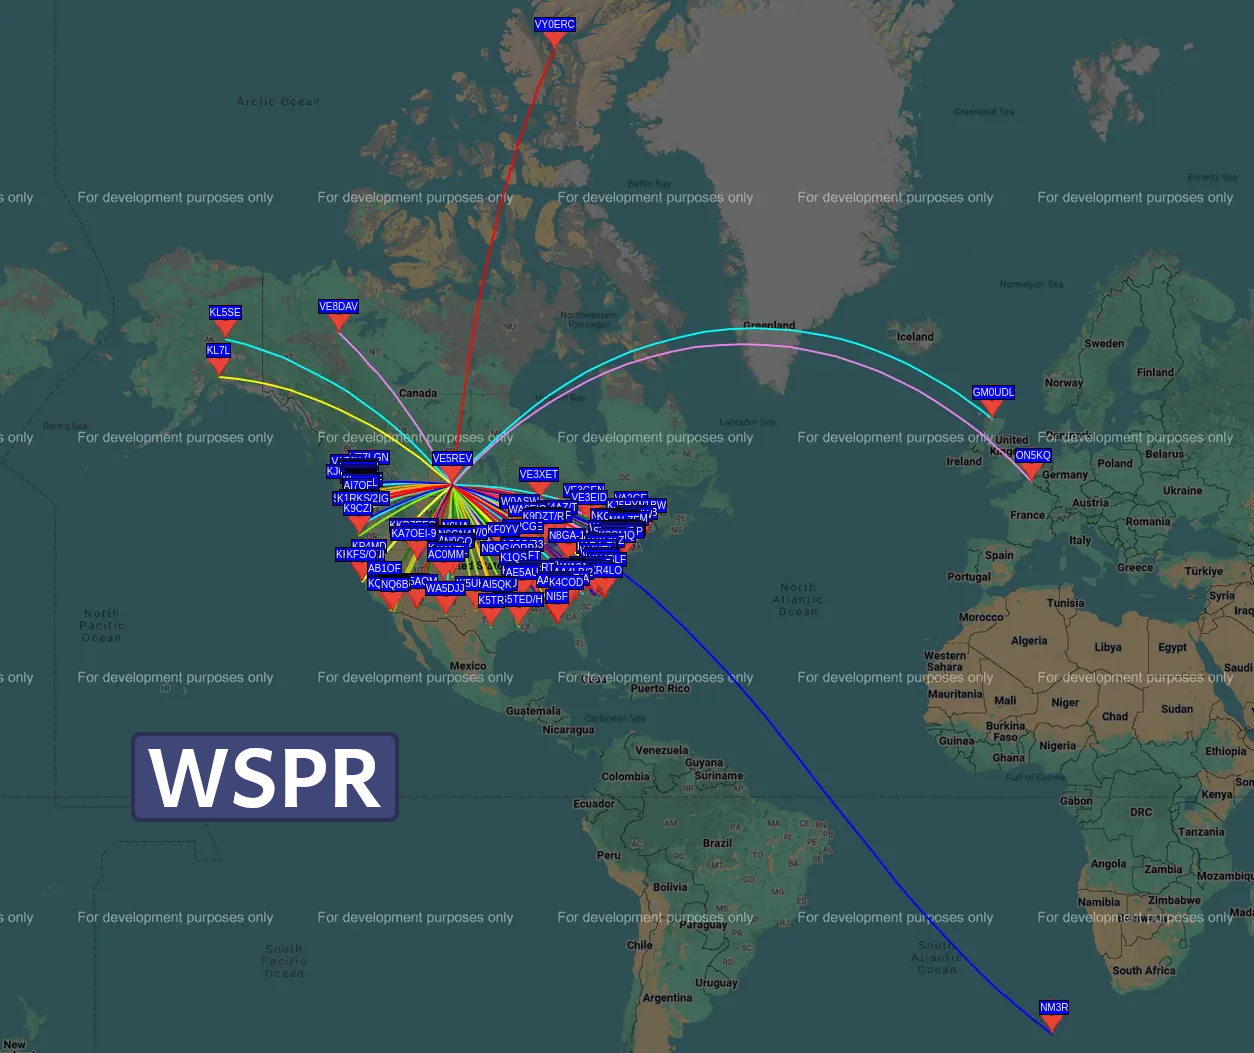
SNR: Max: +19 Min: -32 Avg: -13
KM DISTANCE: Max: 6,910 Min: 1,080 Avg: 3,995
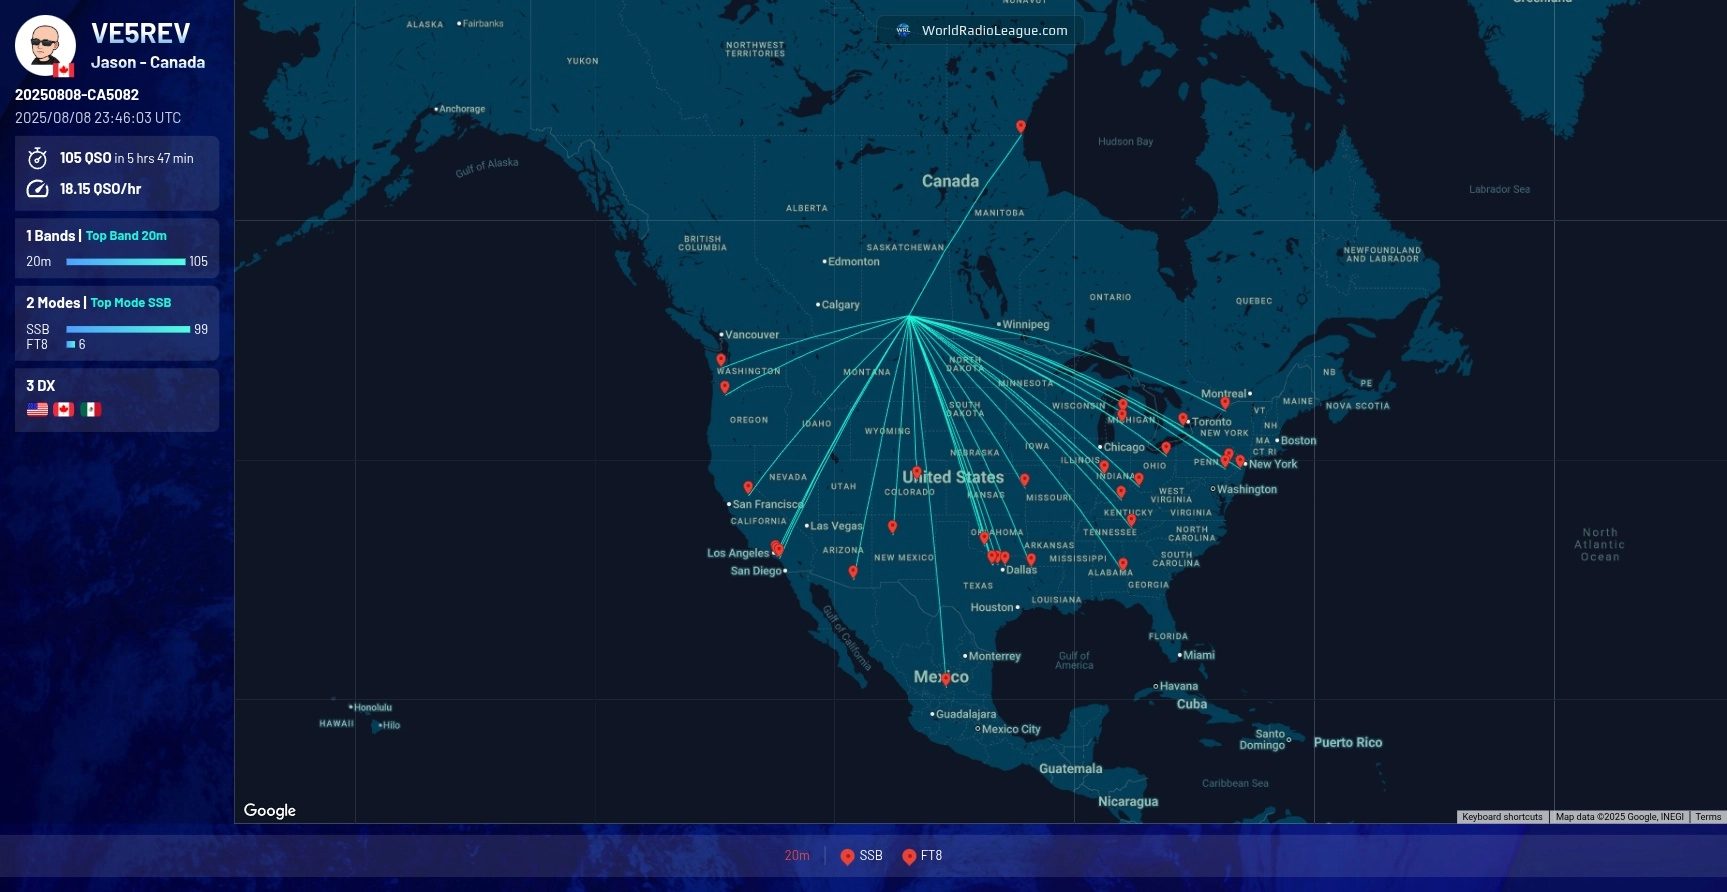
POTA Activation
I did a POTA activation with this antenna on August 8, 2025 and it was nothing short of amazing. I had lots of comments that I was the loudest station on the bands. I ran 75W for this activation. The reason it was spread out over so much time was weather. We had a storm come through so I packed down and went back out again later. But it was a very nice spread of contacts. I heard DX stations calling but the band was falling apart and never did make any DX contacts, other than Mexico.
Summary
So if you don’t have a whip for maximum band flexibility, this all wire version is not too shabby at all. Greg’s proper design is king though. I still tend to favour the convenience of my vertical EFHW for 20M because you don’t need to mess around with radials. However, I want to do a side by side comparison of the different results between them. I think the POTA PERformer will out-perform the EFHW because of the little gain bump and not having transformer core losses. Maximum performance vs. a bit more convenience.
More Info
73 de VE5REV