Inverted-L EFHW Antenna
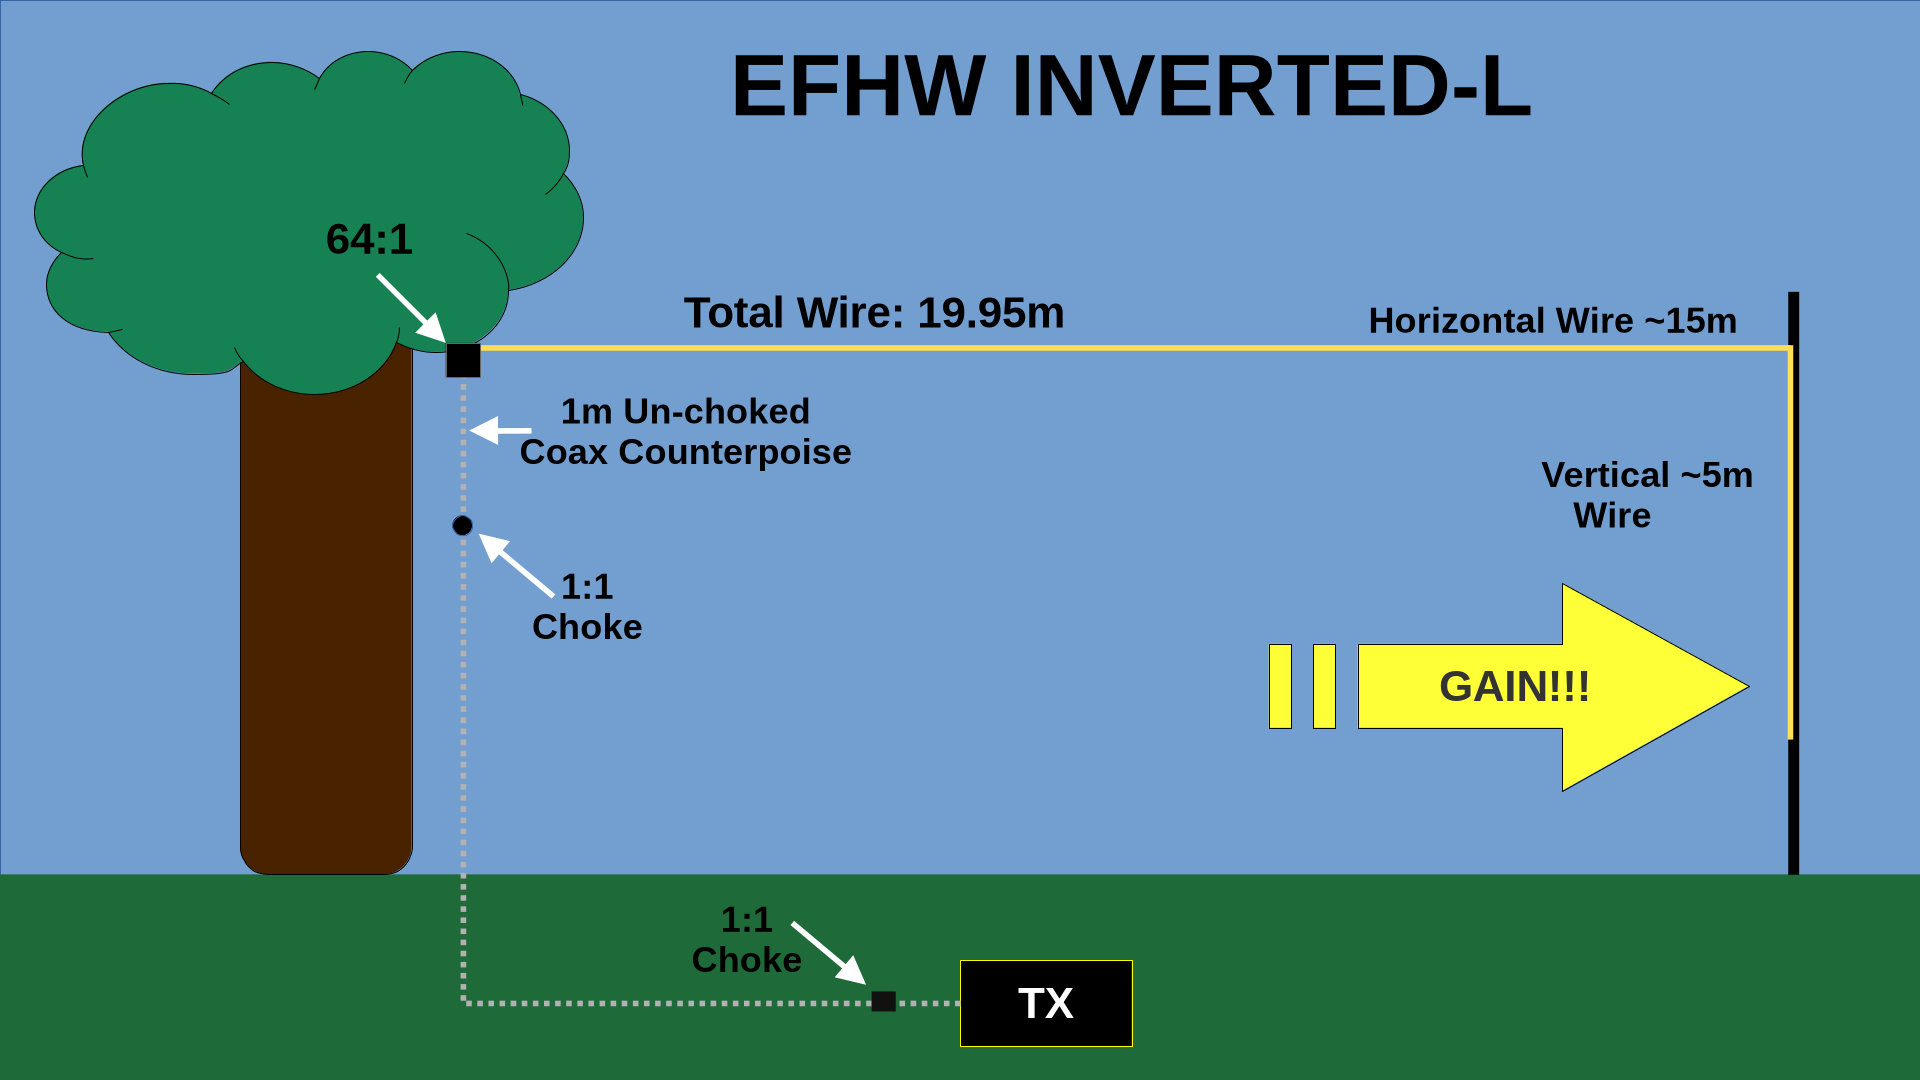
The tried and trusted Inverted-L Antenna shape. It’s a great way of accommodating a longer wire antenna in a more compact footprint. And apparently, it’s gainish in the direction of the bent shorter section. I figured I’d make one to use as a 40M EFHW antenna.
Concept
Really, this is just a deployment choice for an End Fed Half Wave. You can put them up in all kinds of shapes. But what appeals to me about the Inverted L is the prospect of directivity. You can get some added gain in the direction of the vertical portion of the antenna. This is a useful advantage, in addition to making a pretty long antenna a bit more compact. This is a good thing for POTA or camping and such.
Build Notes
Transformer
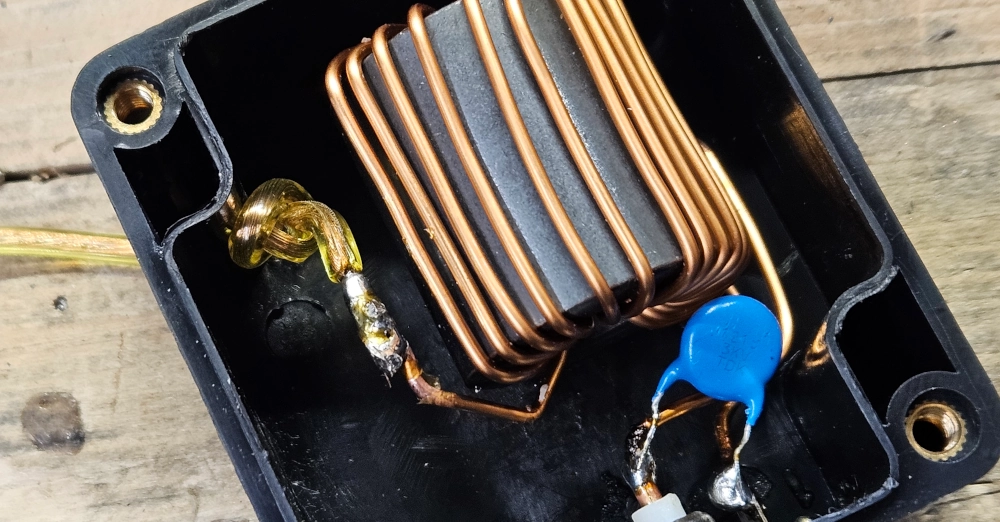
I built a 64:1 transformer (2 and 16) out of one of my favourite cores the Type 61 2661102002. It was the same core I used in my ultra-compact EFHW for QRO build. It’s incredibly efficient and has great thermals. I know that for 40M (and lower) you get better performance from greater inductance. I still need to put up a post of my 40M NVIS antenna I built for EMCOMM. That’s an 81:1 built on the Type 43 Fatty Core. But I learned through testing that because you can’t get those lower band antennas high enough for optimal deployment (who’s got 66’ o’ vertical at a POTA park?!), then you can squeeze better SWR out by adding more inductance to the transformer.
I also learned that when you do this, it messes with harmonics. So, I’ve pretty much given up on multi-band EFHWs. The tried and true 49:1 will give the best harmonics without having to mess with extra inductance coils (installed 6’ from the transformer) to line up the resonant points. But now, I’d rather just put up another resonant EFHW wire for other bands. So with this in mind, I was only interested in getting the 40M band to cooperate. If the other harmonics came along, swell. If not, I don’t care. This approach is more efficient and less lossy whilst sacrificing a bit of convenience.
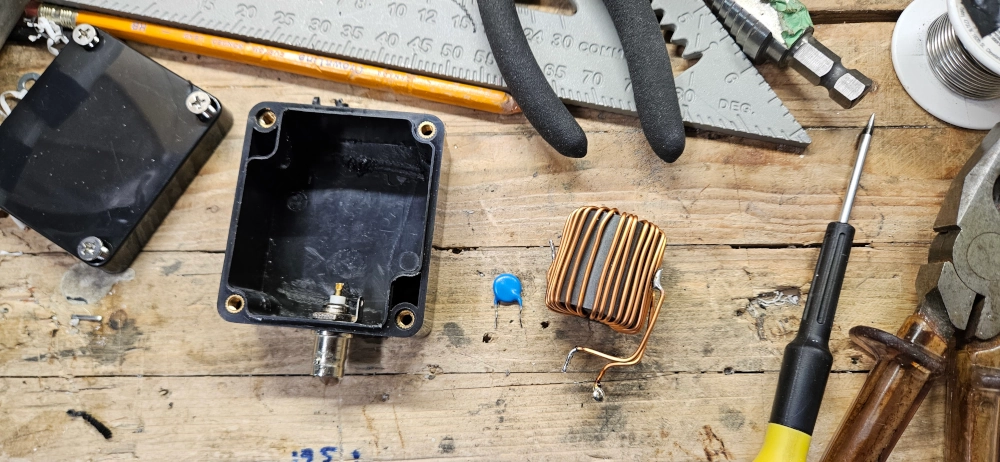
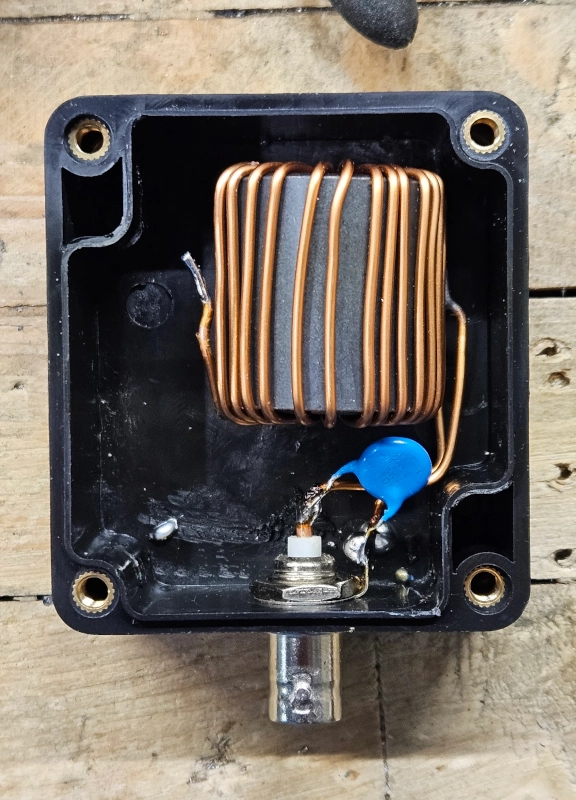
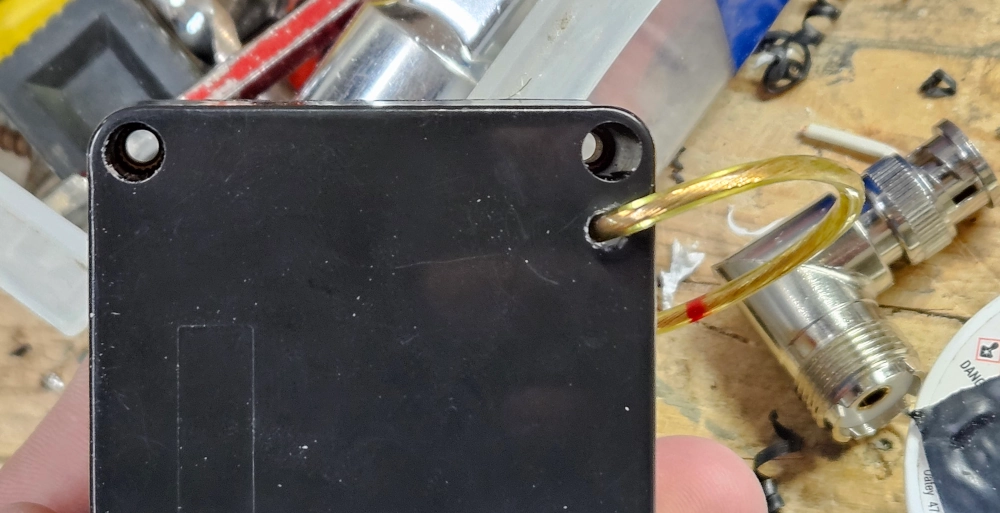
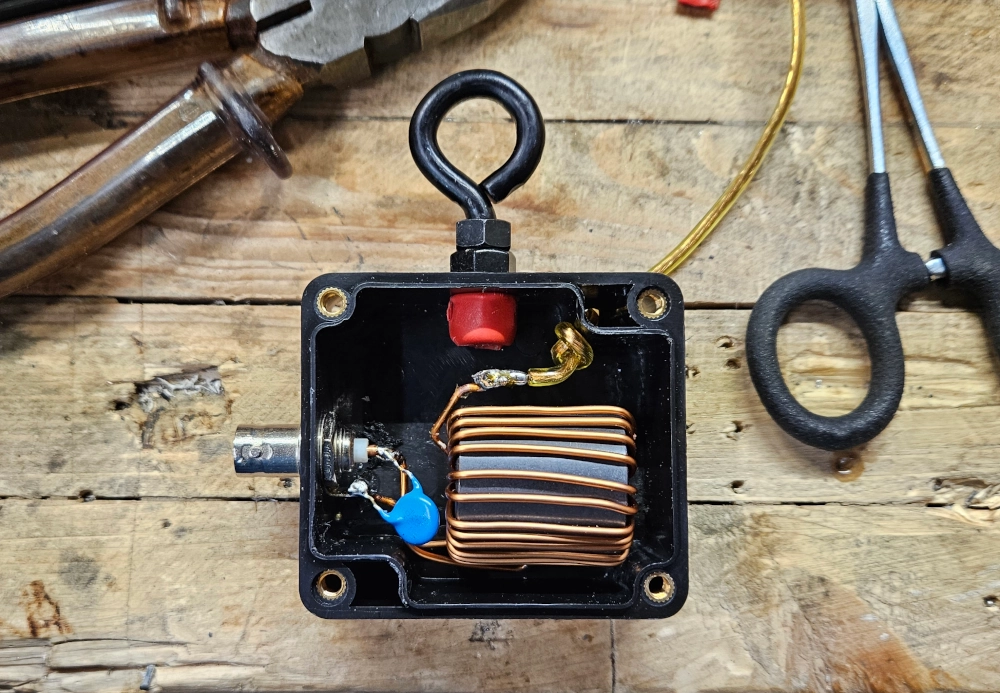
I had these little project boxes from Amazon that I bought my mistake. I put a choke in one and this core in the other one. Fits like a glove! BNC connector. 120pF capacitor (which should help with higher band harmonics).
Wire
I had some 18AWG speaker wire in stock. It’s kinda bulky and heavier than the typical silicone wire I usually use. But it’s also pretty robust too. This setup isn’t climbing any mountains. Also, I tried something I’ve never done previously on a build. I made the wire fixed. You can’t swap it out, it’s soldered right to the core. The project box already had a hole in it that fit the wire diameter perfectly. I was able to bring the wire into the box through the inside. This saved another external perforation and the connection hassle. I snuck it in, tied a knot for strain relief and soldered it right to the toroid enamel wire.
Eye Bolt
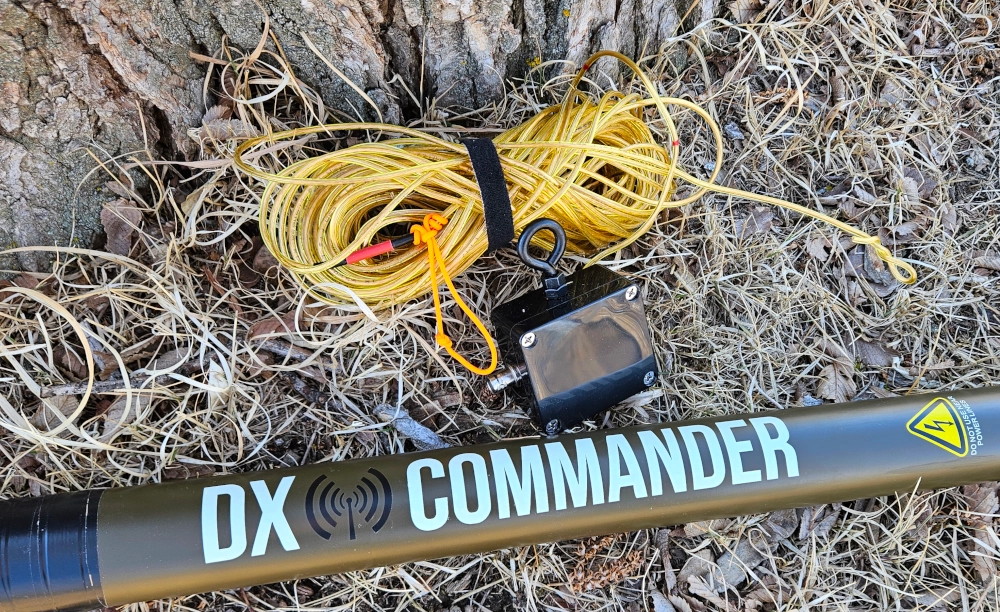
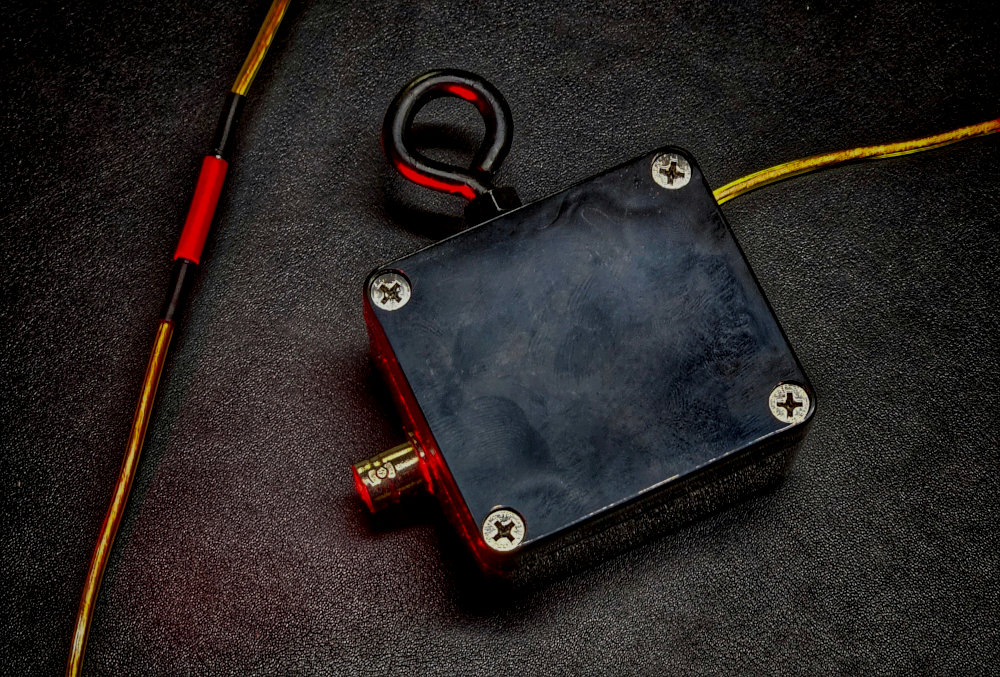
I included an eye bolt because I knew I wanted to hoist the transformer up into a tree for deployment. I had this matching black one in stock. I put a nylon lock nut on the bottom of it to hold it in place. I also put heat shrink on it to help isolate it from the toroid - jury is still out on if that will actually help or not. But it looks festive! LOL! I also added a bit of hot glue to keep everything in place.
And speaking of festive, I put this contrasting marking on the antenna wire with heat shrink. This is where the bend goes for the vertical section. You can see it instantly when going to set it up.
Field Tests
The Deployment
This is actually a pretty easy field deployment. I used one tree branch and my DX Commander mast for the vertical part. I got my rope over the branch and tied to the eyebolt. I almost always use the Siberian Hitch for this as it is quick release and super easy. For counterpoise, I used a 1m/3’ piece of unchoked coax. Then I popped in my DIY BNC 1:1 choke to isolate the 50’ of RG-316. This will keep the coax from sucking current from the antenna wire and help keep the radiating pattern cleaner.

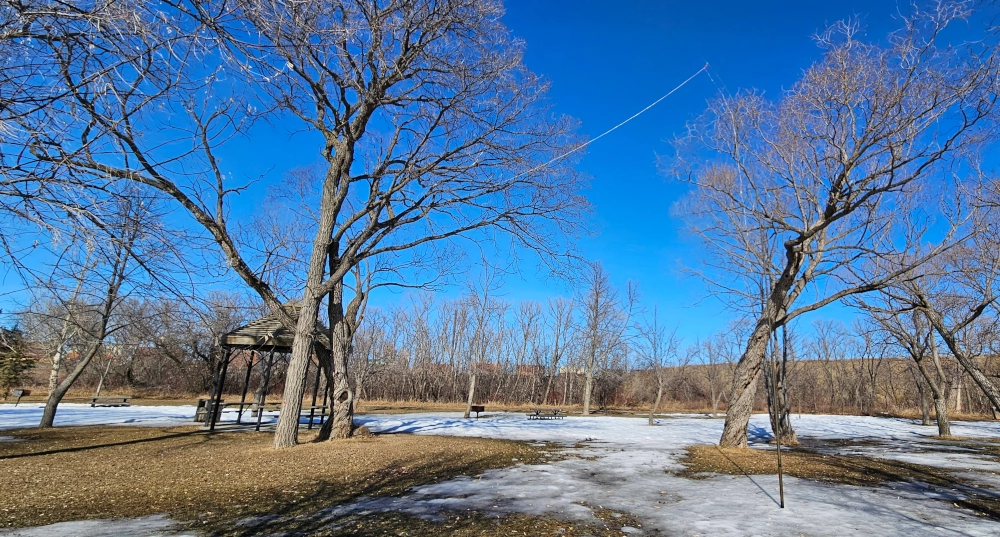
I used a prusik hitch to tie the antenna wire to the mast at my fancy heat shrink mark. Then I extended the mast, leaned it in a tree and let the top branches support it where the wire was putting stress on the mast. Super quick and easy deployment.
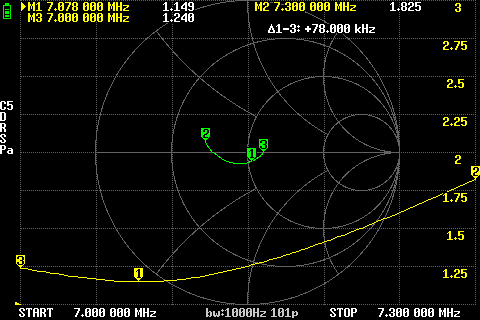
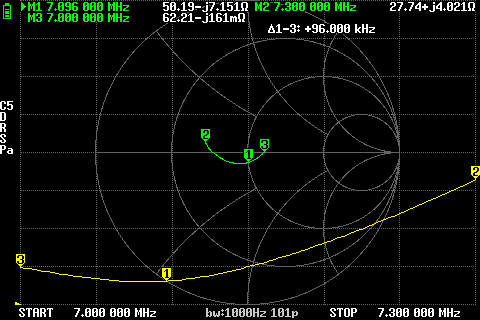
NanoVNA Sweeps
I slapped another 1:1 choke at the rig end of the coax and hooked up the NanoVNA. After some trimming, I got this result. I could have trimmed a bit more to bring the dip over to the middle of the band. Not too shabby. The extra inductance of the 64:1 really helps as predicted. Smith chart said we were 50ohms and low reactance to boot. 40M was good to go.
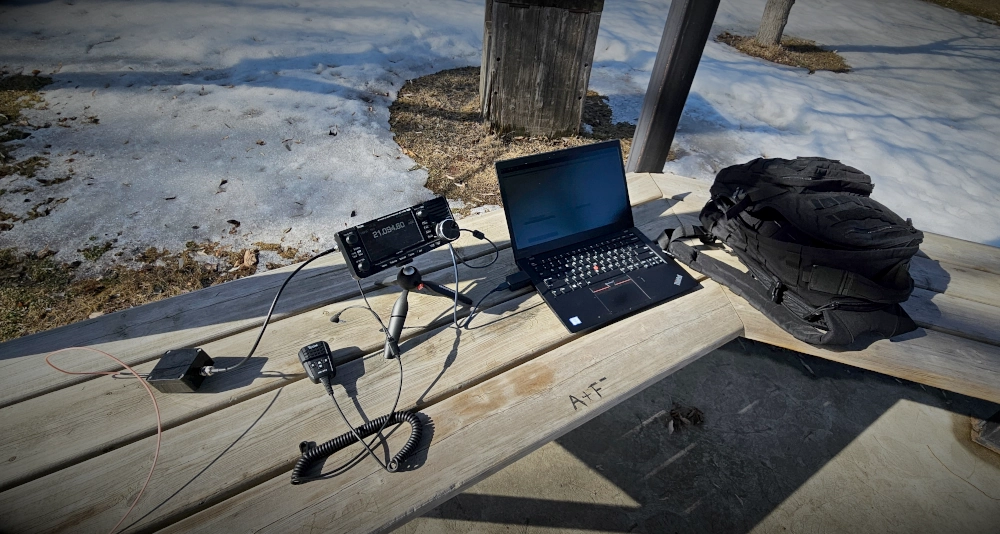
WSPR Results
I was stoked to try this config out! The Nano told me I also scored the 15M band harmonic. Booya! I had configured the antenna wire at a 130 degree bearing which from my location which put my signal right through Brazil. I was excited to see if the gain from the Inverted L was going to hook me up with South American DX a plenty! I fired up the IC-705 the laptop and let WSPR run. 1 watt for 20 minutes.
And… ummmmm… well. The contacts were in the desired direction. But what a dumpster fire! What the heck was going on?
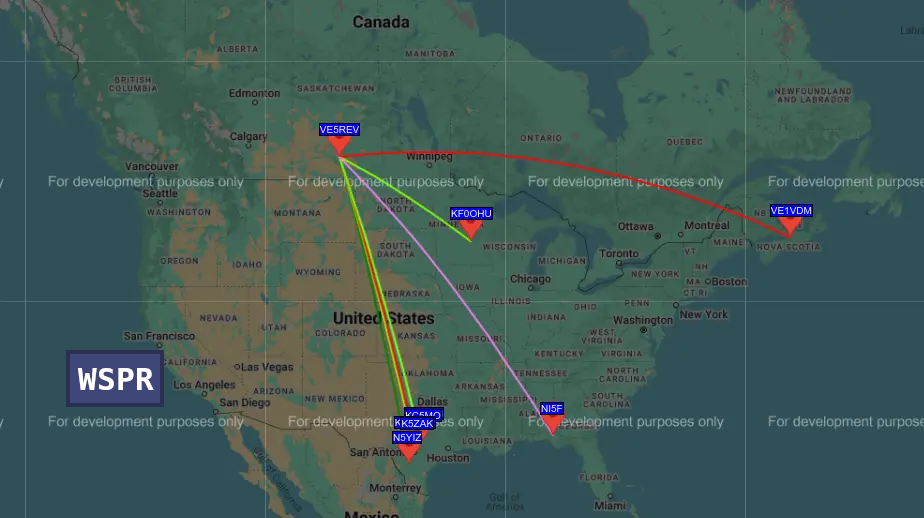
I looked at my setup, everything was connected properly. SWR, ALC, everything was good. So then I checked the conditions…
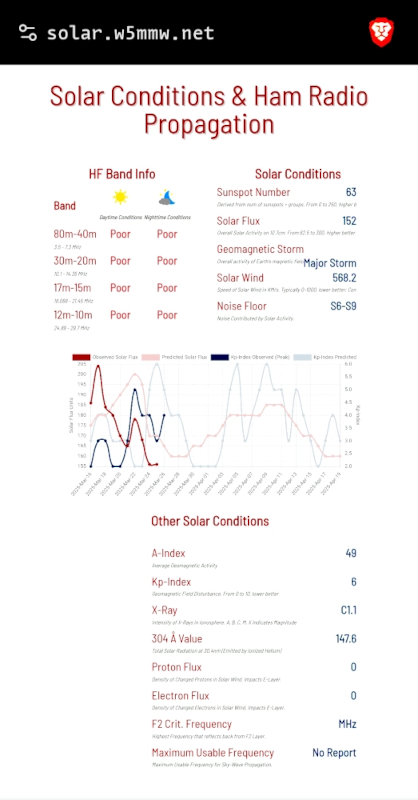
So that explains that! I really should have checked that before I went out to, you know, do antenna testing! #Curses!! Welp, might as well try 40M. And to my surprise, we got some contacts. Lots of NVIS close contacts too!
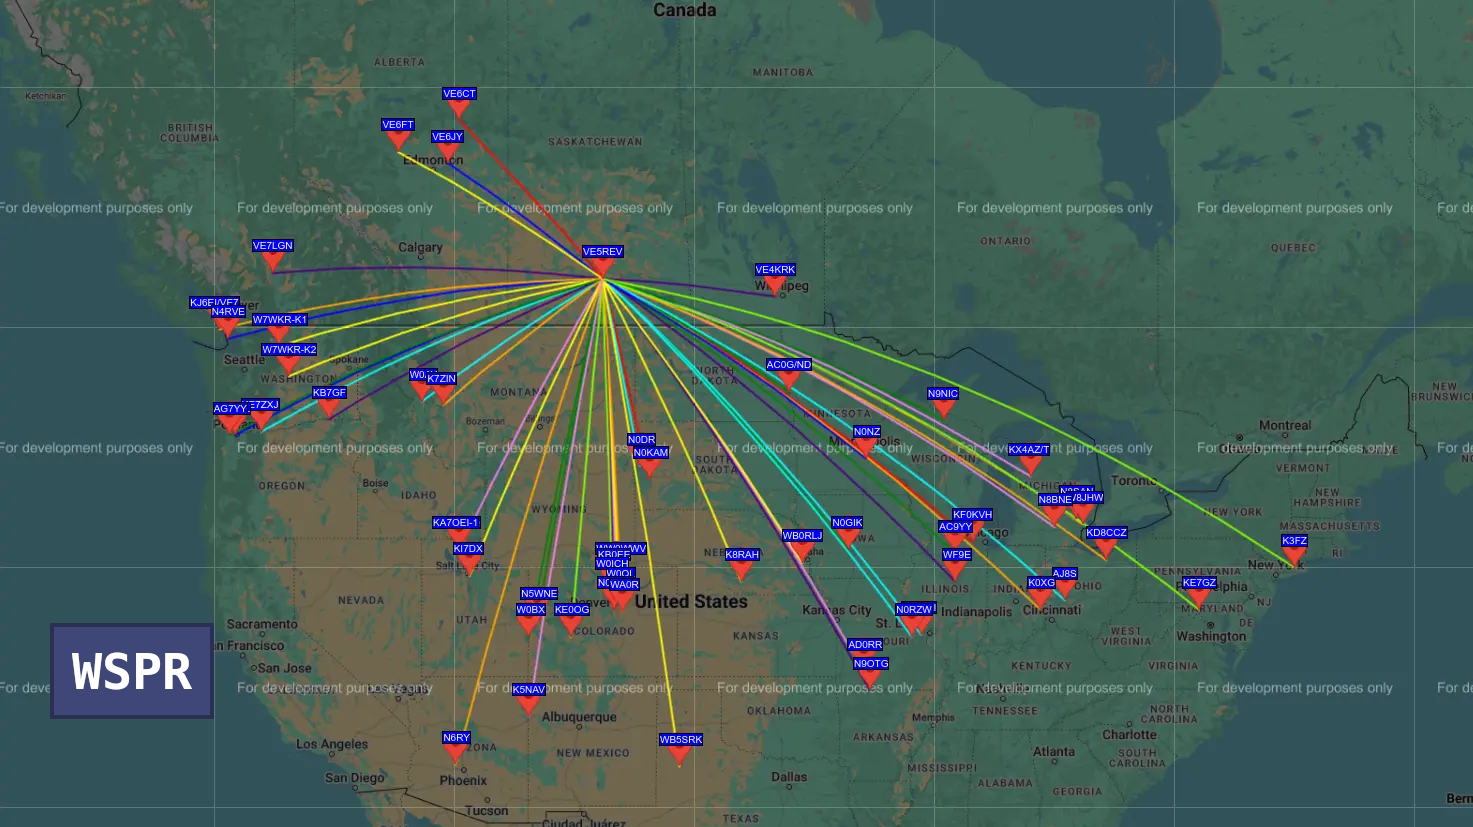
I got 51 total contacts in abjectly horrendous conditions. Not too shabby!
SNR - MAX:00 MIN:-27 AVG:-14
Distance (KM) - MAX:1663 MIN:579 AVG:938
SSB Contacts
Zero. I tried to hunt some POTA stations but it was impossible. I couldn’t hear anything. This is a testament to the near miraculous capabilities of WSPR and digital modes when conditions are abysmal.
In Conclusion
Despite the utter gong show and comedy of errors the results of this test ended up being, I’m satisfied with this build and deployment. I will definitely be setting this up again in the future and try some POTA activations and hopefully some DX with it.
73 de VE5REV